

Many first-time backpackers to Vietnam underestimate the planning required, often leading to visa headaches, overpacking, or budget surprises. The most important conclusion? Secure your visa early, pack half of what you think you need, and budget more for experiences than for fancy meals. Vietnam is an incredible country, but a smooth trip hinges on smart preparation to avoid common pitfalls.
Visa & Entry: Navigating Vietnam’s Requirements
Getting your visa right is the first, most critical step for any backpacking trip to Vietnam. Missing this detail can ground your trip before it even begins. Vietnam offers several visa options, and understanding the differences between them is to a stress-free entry. Do not arrive without a pre-arranged visa or approval letter if you are not from one of the visa-exempt countries. Immigration officials are strict, and you will be denied boarding by your airline.
E-Visa vs. Visa on Arrival (VOA)
The electronic visa, or E-Visa, is generally the most straightforward and recommended option for most travelers. As of 2026, Vietnam’s E-Visa system allows citizens of many countries to apply online for a single-entry visa valid for up to 90 days. The application process is entirely digital: you fill out a form, upload a passport photo and a scan of your passport’s data page, and pay the fee (typically around $25 USD). Approval usually takes 3-5 working days, though it can sometimes be quicker. Once approved, you receive an E-Visa letter via email, which you print and present upon arrival. This method bypasses the need for an approval letter and a separate stamping fee at the airport, making it efficient.
The Visa on Arrival (VOA) process is a bit more involved. It requires obtaining an approval letter from a licensed Vietnamese travel agency *before* you fly. You apply through an agency online, pay a service fee (around $10-20 USD), and they send you an official approval letter. With this letter, you fly to Vietnam, then queue at the "Visa on Arrival" counter at an international airport (Hanoi, Ho Chi Minh City, Da Nang, Nha Trang). Here, you submit your approval letter, passport, two passport-sized photos, and pay a stamping fee (typically $25 USD for single entry). While VOA can be cheaper overall if you find a good agency, it involves more steps and potential wait times at the airport, which can be long during peak hours.
Visa Extensions and Overstaying
If you plan to stay longer than your initial visa allows, extending your visa is possible but can be complicated and costly. Visa extensions must be processed *before* your current visa expires. You will need to work with a local travel agency in Vietnam, as individuals cannot directly apply for extensions. The cost varies significantly based on your nationality, the duration of the extension, and the agency’s fees, often ranging from $100 to $300 USD. The process can take several days to a week. Overstaying your visa is a serious offense in Vietnam. Penalties include significant daily fines (around $25-50 USD per day overstayed), potential detention, and a ban from re-entering the country. Always err on the side of caution and plan your exit or extension well in advance.
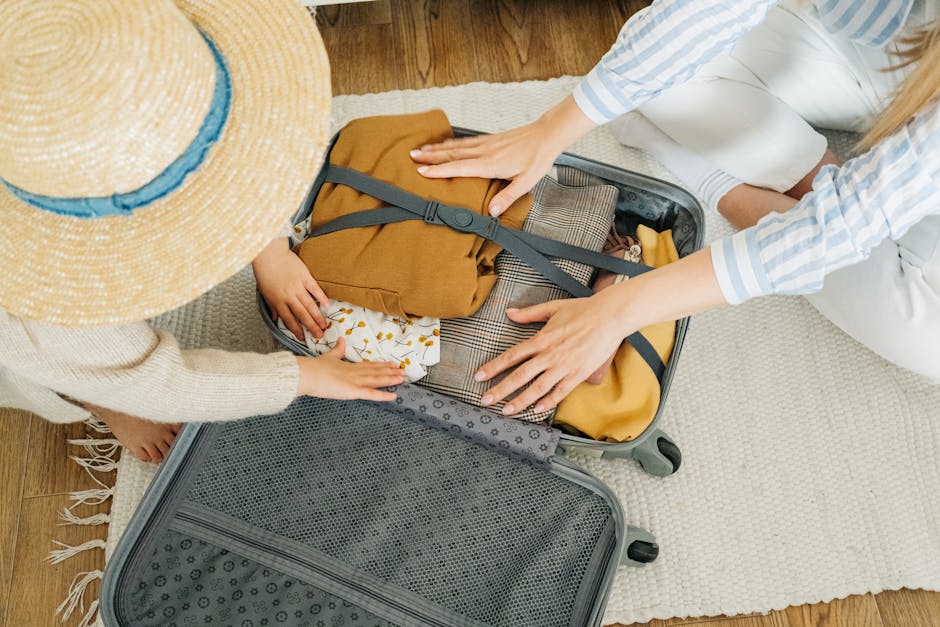
Packing Light for Vietnam’s Climate & Terrain
The biggest packing mistake for Vietnam is bringing too much. You really only need enough for about a week, and then you can wash clothes as you go. Focus on versatility, quick-drying fabrics, and protection from sun and rain. Vietnam’s climate varies wildly from North to South, with hot, humid stretches, cool mountain air, and unpredictable downpours. Your packing strategy should reflect this, prioritizing layers and utility over bulk.
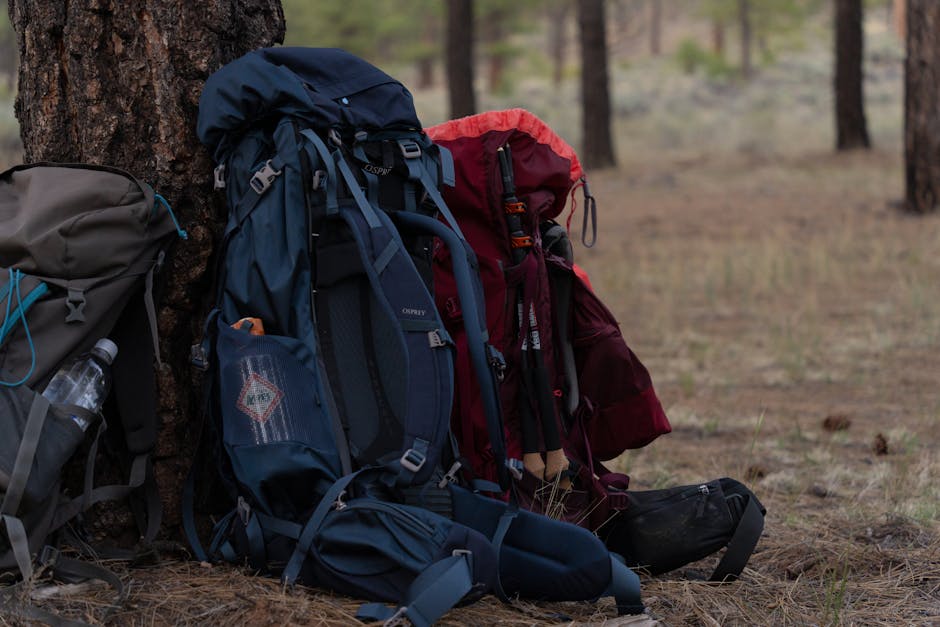
Backpack Choices: Size Matters
Your backpack is your home on the road. For Vietnam, a 40-50 liter backpack is the sweet spot. Anything larger becomes cumbersome on local transport, difficult to maneuver through crowded streets, and often encourages overpacking. Brands like Osprey Farpoint 40L or Fairview 40L (the women’s specific version) are consistently top-rated for their comfortable suspension systems, durable build, and travel-friendly features like full panel zip access. Another solid option is the Deuter Traveller 60+10 SL if you absolutely need more space, but even then, try to stick to the lower end. A smaller daypack (15-20L) that can be folded or attached to your main pack is also essential for daily excursions, carrying water, snacks, and valuables.
- Main Backpack (40-50L): Osprey Farpoint/Fairview 40L (approx. $160-180 USD), Deuter Speed Lite 20 (approx. $70-90 USD) for a daypack.
- Packing Cubes: Indispensable for organization. Helps compress clothes and separate clean from dirty.
- Rain Cover: Most quality backpacks come with one, but ensure yours is waterproof for sudden downpours.
Clothing Essentials for Comfort and Culture
Think light, breathable, and quick-drying. Cotton is fine, but synthetic blends are often better for humidity and rapid washing. Respect local customs by having options that cover knees and shoulders, especially for temple visits. You’ll thank yourself for these when visiting ancient sites or religious buildings.
- Tops: 3-4 t-shirts (mix of quick-dry and cotton), 1-2 long-sleeved shirts (for sun protection or cooler evenings in the mountains).
- Bottoms: 2 pairs of shorts, 1-2 pairs of lightweight trousers (linen or quick-dry hiking pants), 1 pair of leggings or long skirt.
- Outerwear: A light rain jacket (e.g., Columbia Watertight II, around $60-80 USD) is non-negotiable. A light fleece or long-sleeved top for cooler mountain regions like Sapa or Da Lat.
- Swimwear: 1-2 suits for beaches and hotel pools.
- Undergarments & Socks: 5-7 pairs, quick-drying preferred.
Footwear: Prioritize Practicality
You’ll be walking a lot, often on uneven surfaces, and possibly dealing with rain. Ditch fashion over function here.
- Comfortable Walking Shoes: A good pair of sneakers or light hiking shoes (e.g., Merrell Moab 3, around $120-140 USD) is crucial. Ensure they’re broken in.
- Sandals/Flip-flops: Essential for showers, relaxing, and quick errands. Teva Original Universal sandals (around $50-60 USD) offer more support than basic flip-flops and are great for walking short distances or getting wet.
- Water Shoes: If you plan on canyoning, kayaking, or exploring caves, dedicated water shoes are a good idea.
Budgeting Your Vietnam Adventure: Costs & Savings
Vietnam is famously affordable, but costs can quickly add up if you’re not mindful. A realistic daily budget varies significantly based on your travel style. Most backpackers find a comfortable range, allowing for diverse experiences without breaking the bank.
| Category | Budget Backpacker (USD/day) | Mid-Range Traveler (USD/day) |
|---|---|---|
| Accommodation (Hostel dorm/Basic guesthouse) | $8 – $15 | $20 – $40 |
| Food (Street food/Local restaurants) | $5 – $15 | $15 – $30 |
| Local Transport (Buses/Grab/Xe Om) | $3 – $10 | $10 – $20 |
| Activities/Tours | $5 – $20 | $20 – $50 |
| Drinks (Water, coffee, beer) | $2 – $7 | $7 – $15 |
| Miscellaneous (SIM, laundry, snacks) | $2 – $8 | $8 – $15 |
| Total Daily Estimate | $25 – $75 | $80 – $170 |
Daily Spending Estimates
The table above provides a general guide. A true budget backpacker, primarily eating street food, staying in dorms, and using public buses, can easily stick to the lower end, around $30-40 USD per day. This allows for comfortable travel, though perhaps fewer organized tours. To comfortably enjoy a few tours (like a Ha Long Bay cruise or a Mekong Delta trip), indulge in some nicer meals, and stay in private guesthouse rooms, aiming for $50-70 USD per day is more realistic. High-end experiences or luxury hotels will push you well beyond these figures.
Transport Costs & Savings
Getting around Vietnam is surprisingly affordable, but planning can save you even more. Local buses are the cheapest option for inter-city travel, though they can be slow. Sleeper buses are a backpacker staple for long distances, costing around $10-25 USD for an overnight journey between major cities (e.g., Hanoi to Hue). The reunification train line (Vietnam Railways) is more comfortable and scenic, but typically pricier, with soft sleeper berths ranging from $30-70 USD for similar distances. For shorter distances and within cities, ride-sharing apps like Grab (for motorcycles and cars) are incredibly convenient and cheap, usually costing $1-5 USD per ride. Negotiating with "xe om" (motorbike taxi) drivers is possible but always agree on a price *before* you get on. Avoid regular taxis unless metered and reputable, or pre-booked via your accommodation.
Accommodation Options
Hostels are abundant and incredibly social, with dorm beds starting at just $5-10 USD, often including breakfast. Many hostels like Vietnam Backpackers Hostels or The Hideout Hostels are well-regarded. For more privacy, budget guesthouses and homestays offer private rooms for $15-30 USD. Booking platforms like Booking.com or Agoda are widely used. Off-season travel (May-September) often sees lower prices and fewer crowds.
Staying Safe & Healthy on the Road
Vietnam is generally a safe country for travelers, but like any popular destination, it has its quirks and potential hazards. Being aware of common issues and taking preventative steps will significantly reduce your risk and keep your adventure enjoyable. Your biggest concerns will likely be petty theft and road safety.
- Guard Against Petty Theft:
- Keep your valuables secure, especially in crowded markets, bus stations, and on public transport. A money belt worn under your clothes is a good idea for passport and large sums of cash.
- Be mindful of snatch-and-grab incidents, particularly from motorbikes. Do not walk with your phone out or bag loosely slung across one shoulder, especially near busy roads.
- In hostels, use lockers for your passport, electronics, and cash. Always carry a small padlock.
- Road Safety is :
- Traffic in Vietnamese cities is chaotic. Always look both ways, multiple times, before crossing the street. Don’t wait for a gap; walk slowly and predictably, allowing motorbikes to flow around you.
- If renting a scooter, ensure you have appropriate insurance (travel insurance that covers motorbike accidents), an international driving permit, and wear a helmet. The roads can be dangerous, and accidents are common. Consider a basic riding lesson if you’re inexperienced.
- For longer journeys, choose reputable bus companies or trains. Avoid excessively cheap "open bus" tickets if quality seems questionable.
- Food and Water Hygiene:
- Stick to busy street food stalls; high turnover usually means fresh ingredients. Watch how food is prepared.
- Always drink bottled water, or better yet, use a personal water filter like a Sawyer Squeeze Mini (approx. $25 USD) or a LifeStraw Go bottle (approx. $40 USD) to reduce plastic waste.
- Avoid ice in drinks unless you’re sure it’s made from purified water (usually cube-shaped, not irregular chunks).
- Wash your hands frequently, especially before eating. Carry hand sanitizer.
- Health Precautions:
- Mosquito Protection: Dengue fever is present. Use a repellent with at least 30% DEET or Picaridin, especially at dawn and dusk. Sleep under a mosquito net if provided in budget accommodation. Popular repellents include OFF! Deep Woods (25% DEET, approx. $8) or Sawyer Picaridin Lotion (20% Picaridin, approx. $10).
- Sun Protection: The sun is intense. Use high SPF sunscreen (SPF 50+), wear a wide-brimmed hat, and seek shade during peak hours (10 AM – 3 PM).
- Travel Insurance: Absolutely essential. Ensure your policy covers medical emergencies, evacuations, and theft. Reputable providers include World Nomads or SafetyWing. Do not travel without it.
- Basic First Aid Kit: Include pain relievers, anti-diarrhea medication (like Imodium), antiseptic wipes, bandages, rehydration salts, and any personal prescription medications.
The Best Itinerary: North, Central, or South?
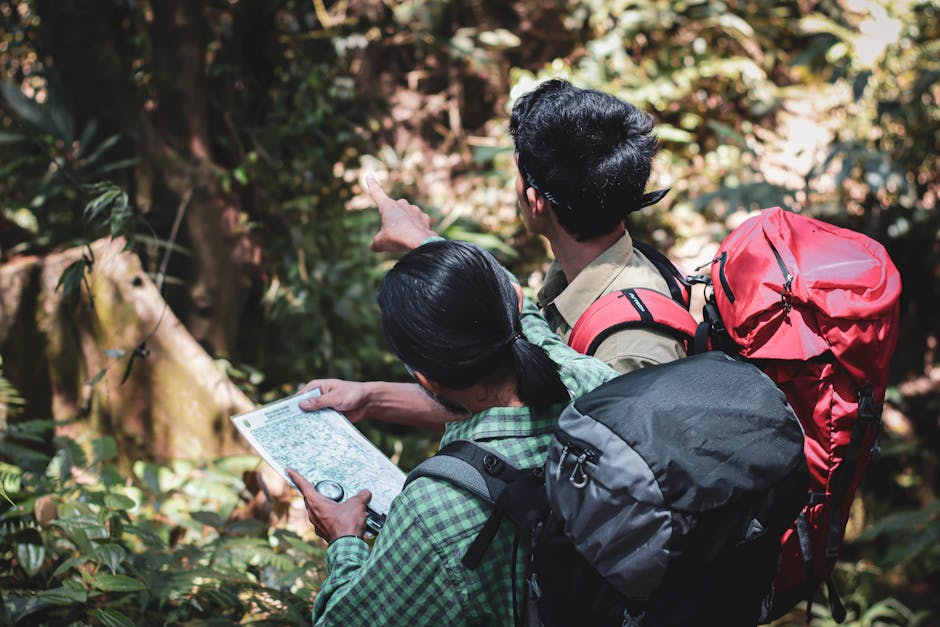
Deciding on a Vietnam itinerary depends heavily on your available time and what you want to experience. Vietnam is a long, thin country, making it ideal for a linear journey, either from North to South or vice versa. There’s no single "best" route, but tailoring it to your interests will make a significant difference. Most travelers journey from Hanoi to Ho Chi Minh City, or the reverse.
Should I start North or South?
There’s no definitive advantage to starting in the North (Hanoi) or the South (Ho Chi Minh City). Many travelers prefer to start in Hanoi and head South, as it often feels like a gradual transition from traditional culture to a more bustling, modern vibe. Others prefer starting in the South, finding it easier to get into the rhythm of Vietnamese travel before heading to the more historically rich, and sometimes cooler, North. Consider flight prices into each city and your home country’s visa requirements as deciding factors. Either way, Vietnam’s excellent internal transport network makes moving between regions straightforward.
How long do I need for each region?
Northern Vietnam (Hanoi, Ha Long Bay, Sapa): Allow at least 7-10 days. Hanoi itself warrants 2-3 days to explore its Old Quarter, Hoan Kiem Lake, and historical sites. Ha Long Bay (or the less crowded Lan Ha Bay) typically requires a 2-3 day/1-2 night cruise. If trekking in Sapa or exploring Ha Giang on a motorbike loop, add another 3-5 days. This region offers stunning natural landscapes and a deeper dive into traditional Vietnamese culture.
Central Vietnam (Hue, Da Nang, Hoi An): Allocate 5-7 days. Hue, the former imperial capital, needs 1-2 days for its citadel and tombs. Da Nang is a modern coastal city, often serving as a transit hub, offering beaches and easy access to the Marble Mountains. Hoi An is the jewel of the center, a UNESCO World Heritage town renowned for its lanterns, tailors, and ancient architecture. Plan 2-3 days here for cycling, cooking classes, and exploring the charming streets.
Southern Vietnam (Ho Chi Minh City, Mekong Delta, Phu Quoc): Plan for 5-7 days. Ho Chi Minh City (HCMC) is a vibrant, sprawling metropolis requiring 2-3 days for its war history (War Remnants Museum, Cu Chi Tunnels), French colonial architecture, and dynamic street life. A 1-2 day trip to the Mekong Delta is a must for exploring floating markets and river life. For beach relaxation, add 3-4 days to Phu Quoc Island, reachable by short flight or ferry.
What are the must-see spots in each region?
- North:
- Hanoi: Old Quarter, Hoan Kiem Lake, Temple of Literature, Ho Chi Minh Mausoleum.
- Ha Long Bay/Lan Ha Bay: Overnight cruise through limestone karsts.
- Sapa: Trekking through rice terraces, experiencing local H’mong culture.
- Ha Giang Loop: A challenging but rewarding motorbike journey through breathtaking mountain passes.
- Central:
- Hue: Imperial City, Thien Mu Pagoda, Perfume River boat trips.
- Da Nang: My Khe Beach, Marble Mountains, Dragon Bridge.
- Hoi An: Ancient Town, Japanese Covered Bridge, tailor shops, cooking classes.
- South:
- Ho Chi Minh City: War Remnants Museum, Cu Chi Tunnels, Notre Dame Cathedral, Ben Thanh Market.
- Mekong Delta: Floating markets (Cai Rang), fruit orchards, local villages.
- Phu Quoc: Pristine beaches, snorkeling, Phu Quoc National Park.
Vietnam offers an incredible journey for backpackers, full of vibrant culture, stunning landscapes, and delicious food. Approaching it with realistic expectations and thorough preparation allows you to fully immerse yourself in the experience.